


Overview
Issues such as “port conflicts” or “disk space not freeing up after deletion” that occur during Linux system administration can be resolved immediately using the lsof command. In this article, we explore essential techniques for applying lsof in practical environments, where everything is handled as a file in Linux. We will walk through step-by-step troubleshooting know-how essential for system engineers, from port tracking to releasing file locks.
Basic lsof Verification and Checking Open Files by Specific Users/Processes
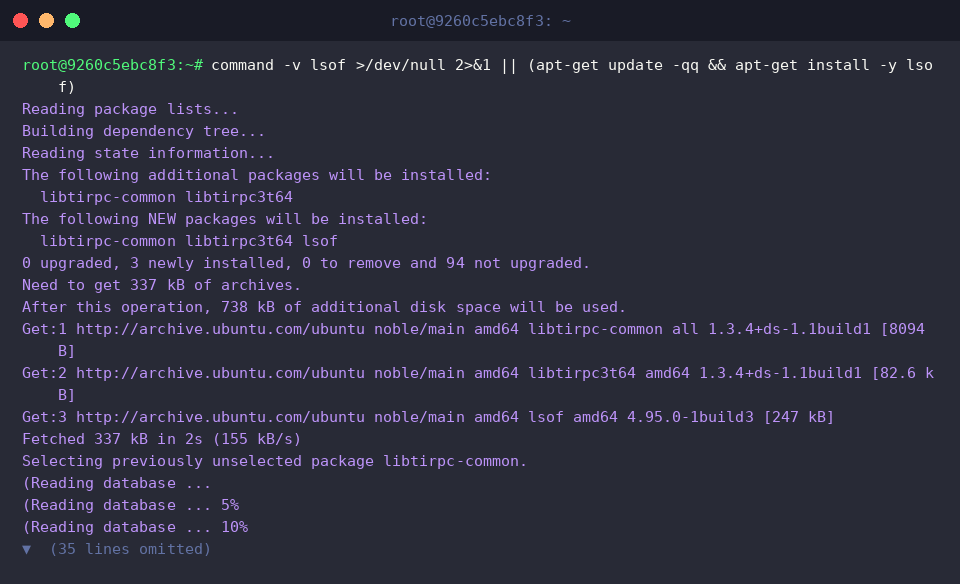
To check if the lsof command is installed on the system and install the package if it is missing, run the command command -v lsof >/dev/null 2>&1 || (apt-get update -qq && apt-get install -y lsof).
Run the lsof -v command to check the installed version and build information of the lsof command.
⚙️ [Key Options]
-u : Lists files and processes opened by a specific user account.-c : Filters the list of files opened by processes starting with the specified process name.-p : Checks the list of files opened by a specific Process ID (PID).-i : Queries processes using network sockets and specific ports.+D : Recursively searches for open files within the specified directory and its subdirectories.-t : Outputs only Process IDs (PIDs) concisely, one per line, which is useful for script integration.

To prepare a test directory and sample file for the lsof hands-on practice, run the command mkdir -p /tmp/lsof_lab && echo '테스트 파일 내용' > /tmp/lsof_lab/sample.txt.

Run tail -f /tmp/lsof_lab/sample.txt & in the background so that a process keeps the created sample file open.

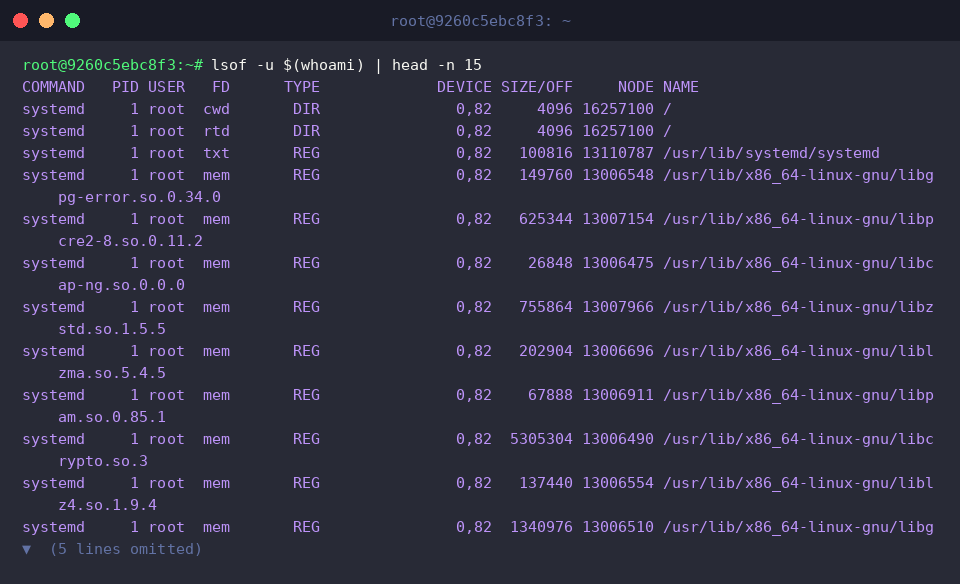
The lsof -u $(whoami) | head -n 15 command retrieves the top 15 lines of files held open by processes running under the currently logged-in user.
You can view detailed information about files opened by the current account, including basic system libraries and executable binaries.
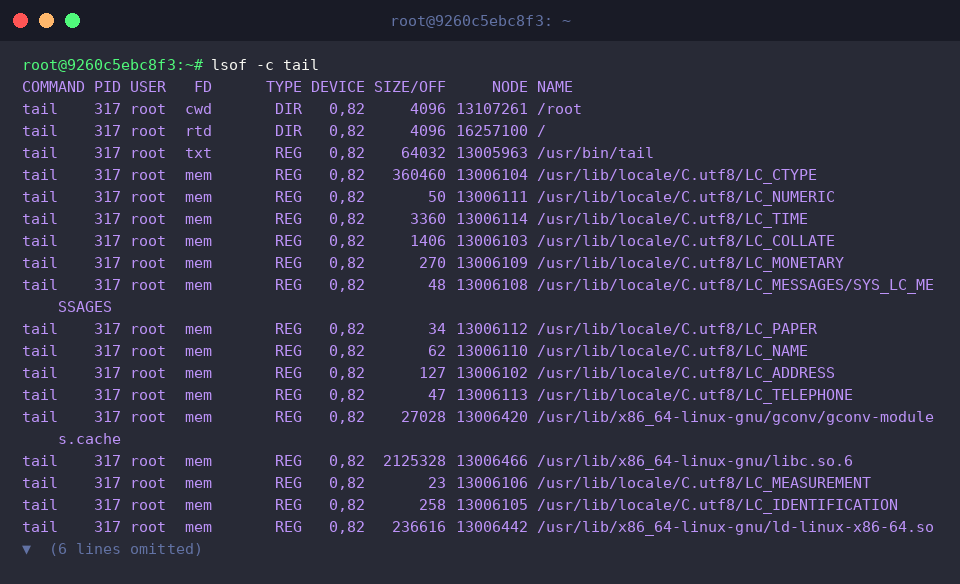
The lsof -c tail command searches and displays the list of files and libraries opened by processes named tail.
Through this, you can verify which file descriptors and shared libraries the background tail command is referencing.
After completing the exercise, run the command killall tail 2>/dev/null || true to safely terminate the background tail process and clean up.

Network Port Inspection and Process Conflict Troubleshooting
To set up the practice environment for port inspection and process conflicts, check whether python3 is installed on the system, and install the package if it is not present.

To test network port occupation, launch a simple web server on port 8080 in the background.

Wait 1 second until the background web server process successfully binds to port 8080.

The lsof -i :8080 command checks for processes using port 8080.
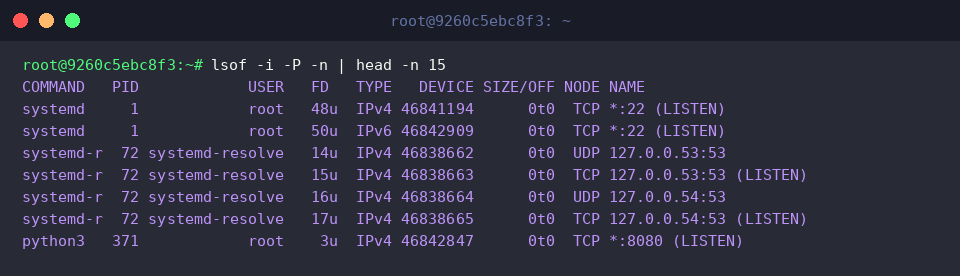
From the output, you can confirm that the python3 process with PID 371 is waiting in the LISTEN state on port 8080.

The lsof -i -P -n | head -n 15 command quickly outputs the system’s network socket list numerically without converting port numbers and IP addresses.
Because it skips reverse DNS lookups and service port name resolution, you can assess port occupation status rapidly without delays.
The lsof -i TCP:8080 -sTCP:LISTEN command precisely filters and displays only connections using the TCP protocol in the LISTEN state on port 8080.
This is useful for excluding unnecessary session connections and accurately identifying only the daemon processes actively listening for connections on that port.

After completing the exercise, terminate the background web server process occupying TCP port 8080 to clean up the occupied resources.

Tracking Specific Directories and Files Preventing Unmount (Device Busy)
To reproduce directory occupation and unmount obstruction scenarios, create a practice directory and navigate into that path.

Run the command echo '작업 중인 파일' > active_work.log to generate a target log file for a process to access.

Run a background sleep process that references the generated file as standard input, holding it continuously.

Change the working directory to the home directory to inspect the status from outside the occupied directory.

The lsof +D /tmp/mount_test command recursively tracks and lists all open files and processes within the specified directory and its subdirectories.
From the output, you can confirm that the sleep process with PID 450 references this directory as its current working directory (cwd) and holds the active_work.log file open in read mode (0r), which is preventing the unmount operation.

After completing the exercise, safely terminate the background sleep process holding the directory and file.

Remove the temporary test directory and all underlying files used in the exercise to clean up system resources.

Recovering and Cleaning Up Ghost Files (deleted) Holding Disk Space
To test disk space leaks, create a test directory and generate a 10MB large test file.

Track the generated large file in the background so that a process keeps holding its file handle.

Forcibly delete the occupied large file from the file system to reproduce a ghost file leak scenario.

The lsof | grep '(deleted)' | head -n 5' command lists files that have been deleted from the file system but are still kept open by processes, occupying disk space.
This allows you to quickly locate ghost files and their corresponding processes where disk space is not reclaimed despite being deleted with the rm command.

Inspect the list of file descriptors in the /proc/$TARGET_PID/fd/ directory based on the process ID extracted with lsof -t.
By directly checking the file descriptor numbers referenced by the process, you can truncate the file to free up space without restarting the process, or recover the deleted original data through that descriptor if needed.
![TARGET_PID=$(lsof -t /tmp/leak_test/large.img 2>/dev/null | head -n 1) && [ -n “$TARGET_PID” ] && ls -l /proc/$TARGET_PID/fd/ || true](/ubuntu/20261007_150808_104/captures/s04_c05_TARGET_PID___lsof_-t__tmp_leak_test_large_img_2__d.png)
After completing the exercise, safely terminate the background process that was holding the ghost file to completely reclaim the disk space.

Completely delete the temporary test directory used in the exercise to clean up system resources.

So far, we have explored essential practical tips using the lsof command, ranging from resolving port conflicts to reclaiming disk space occupied by deleted files.
We hope the concepts covered here prove helpful in solving issues during real-world server operations and troubleshooting scenarios.